How to Publish HN and BPRF Blogs
Original Publish Date: 05/09/2025 by Phoebe Torres
Last Edited on: 05/09/2025 by Phoebe Torres
How to Publish Hospitality Network & Blueprint RF Blog Content
So you have client approval to publish a blog! Yippee. Now we have to finalize a few things in order to get it live.
1. License, Resize, & Optimize Images
Licensing Images:
- Go to the blog and check the bottom left corner for the stock image number.
- Search Adobe Stock for the image numbers and license from there!
Resizing Images in Canva:
- HN & BPRF Hero Images are resized to 1920 x 600
- https://www.canva.com/design/DAFDyAbe-Ig/zg5h-E5dUW74NSvHxJ4aOw/edit?utm_content=DAFDyAbe-Ig&utm_campaign=designshare&utm_medium=link2&utm_source=sharebutton
- HN Blog Body Images are resized to 840 x 390.
- https://www.canva.com/design/DAFBK4KTY0s/-OXKh0OqsWgCulfX3_b_uQ/edit?utm_content=DAFBK4KTY0s&utm_campaign=designshare&utm_medium=link2&utm_source=sharebutton
- BPRF Blog Body Images are resized to 1254 x 836
- https://www.canva.com/design/DAFEROFtUts/Df4vpQPcQCYSsgXzObA4_g/edit?utm_content=DAFEROFtUts&utm_campaign=designshare&utm_medium=link2&utm_source=sharebutton
- Select the downloaded licensed images and upload them to Canva
- Download the resized images as JPGs
Image Optimization
Images should be named as truncated versions of the image alt, eliminating some stop words. For example:
2. Uploading Content
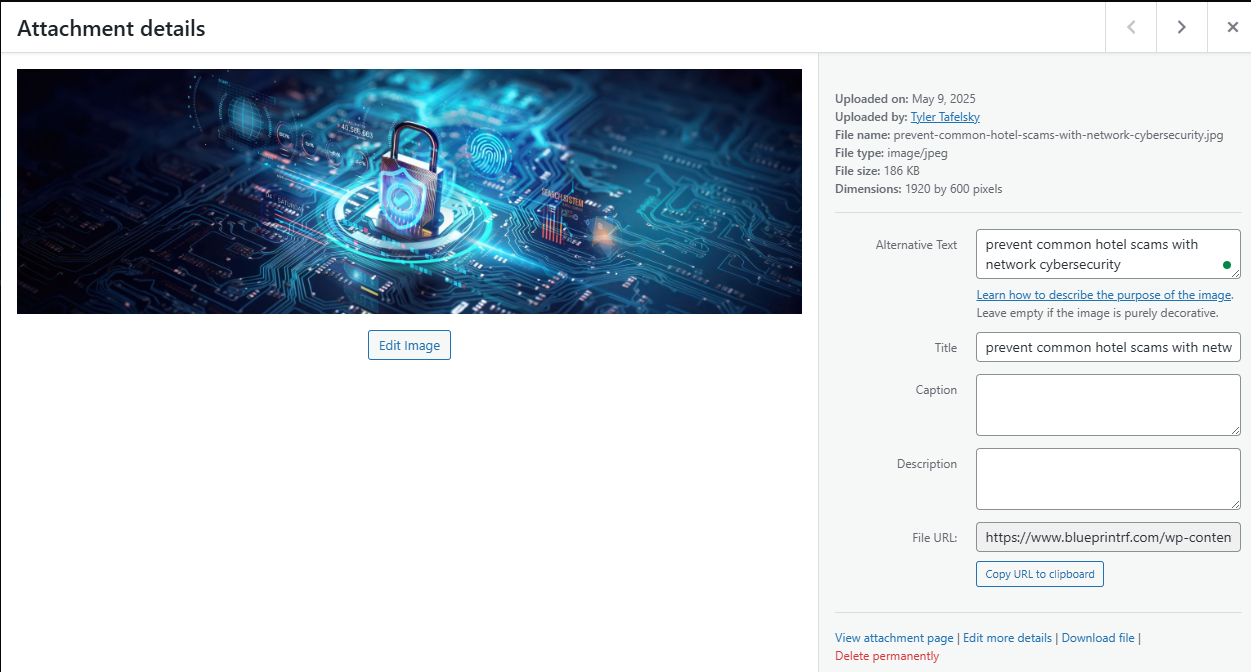
- With image titles renamed, upload all images at once into the WP Media Library.

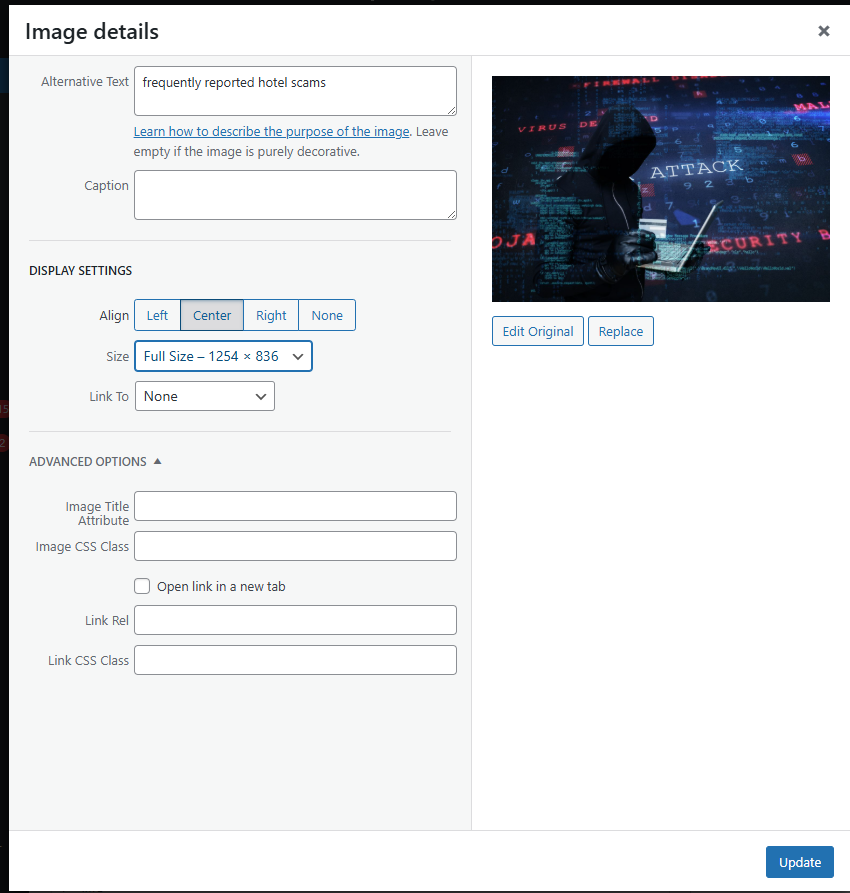
- Then, within the library, click on each image and update the alt text/image title. The alt text/image title should NOT have hyphens.
3. Creating The Post
Go to the “New” button in the dropdown menu and create a new post.
Copy all text from the document and paste it into “Notepad” to clear formatting, then copy & paste from there into WP. This will clear all formatting (and get rid of hyperlinks >:( you have to manually reinsert them).
Add the blog title, and upload all copy into the text box under the visual tab.

Once all copy is added, highlight the full body of the blog and press the eraser button to clear formatting again.
Clean up paragraph spaces, check links, and add images to blog body
Next, we have to clean up the copy formatting.
Eliminate the spaces that we used to format the Google Doc; HN’s websites put those in automatically, so the manual spaces can go.
Redo the H1s and H2s and so forth, referencing the Google Doc.
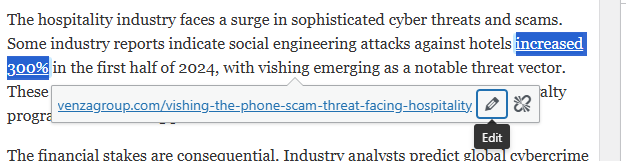
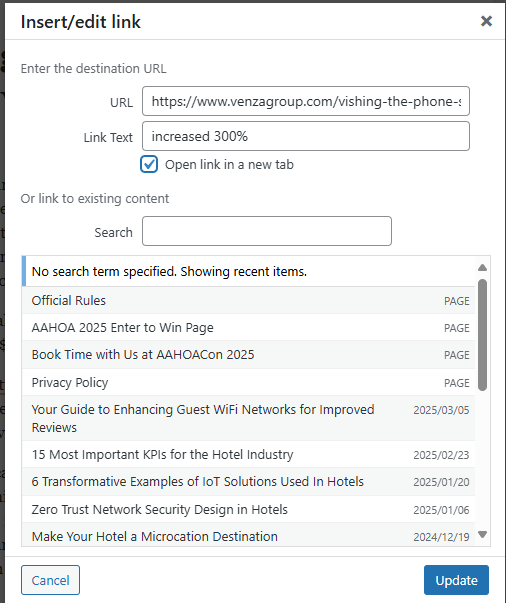
Re-add hyperlinks and make sure every link opens in a new tab. To do so, click on the link, hit the pencil button, and check “Open link in new tab.”
Re-add bullet points to bullet lists.

Once paragraph spaces are eliminated and links are good to go, add images to the blog body where warranted. To do so, click “Add Media” and select the image you want to add. Then, edit the image, align it center, and make it full size.
4. Implement anchor linking (if needed)
Some HN blogs have table of contents, which require manual anchor linking within the blog body, done under the HTML text tab. I can’t explain this as well as this blog can — that page is your bible on this! Test if anchor linking was successful in the blog preview.
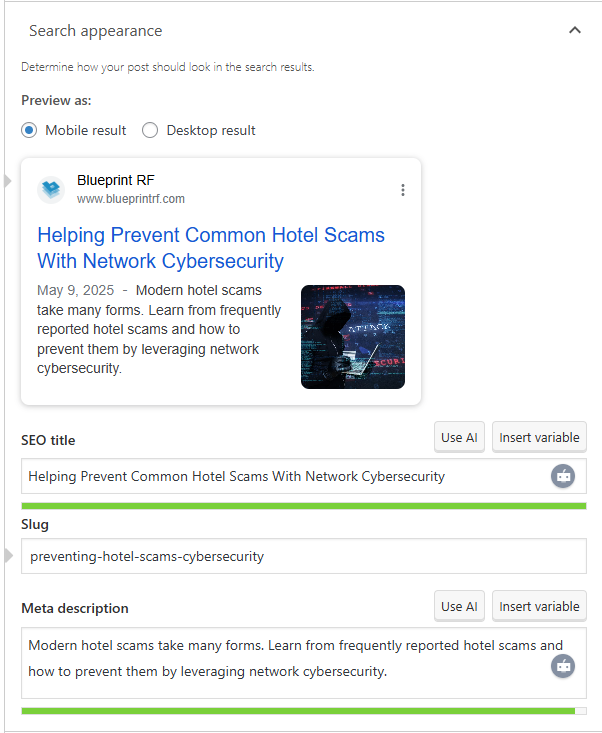
5. Search appearance (SEO title, slug, and meta description)
Now that the body copy is taken care of, it’s time to tackle search appearance. The SEO Title should be the blog title, alongside the website title (if space allows). The Slug should be a shortened version of the blog title (two or three words, containing the blog’s primary keywords), while meta description can pull from a keyword rich portion of the blog’s introduction. You can also use Ahrefs meta description generator for help!
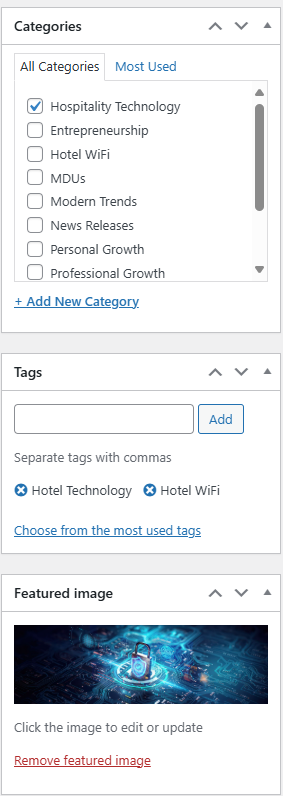
6. Side column (categories, tags, and featured image)
Finally, it’s time to clean up the side column. Sort the blog into the featured category that makes the most sense, select appropriate tags, and add the featured images.
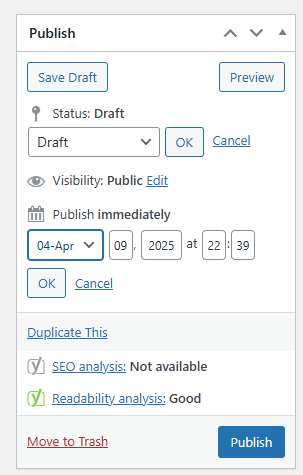
4. Publish, Add to Sitemap & Request Indexing
With everything else sorted out, it’s time to publish! If you need to publish the blog for a date in the past, press edit on the “Publish” button, change to your desired date, and then publish immediately. If scheduling for the future, simply schedule it for a future date and time.
Add to Sitemap
The final two steps have less to do with publishing and more to do with indexing
Simply go to the sitemap page
Go to “Dashboard” and click into the “Pages” tab, search for “sitemap”
OR on the HN website, you have the option to scroll to the bottom of any page and select “Sitemap” and press “Edit”

Add the page at the top of the bulleted list for blog posts! Be sure to edit so that the link opens in a new tab.
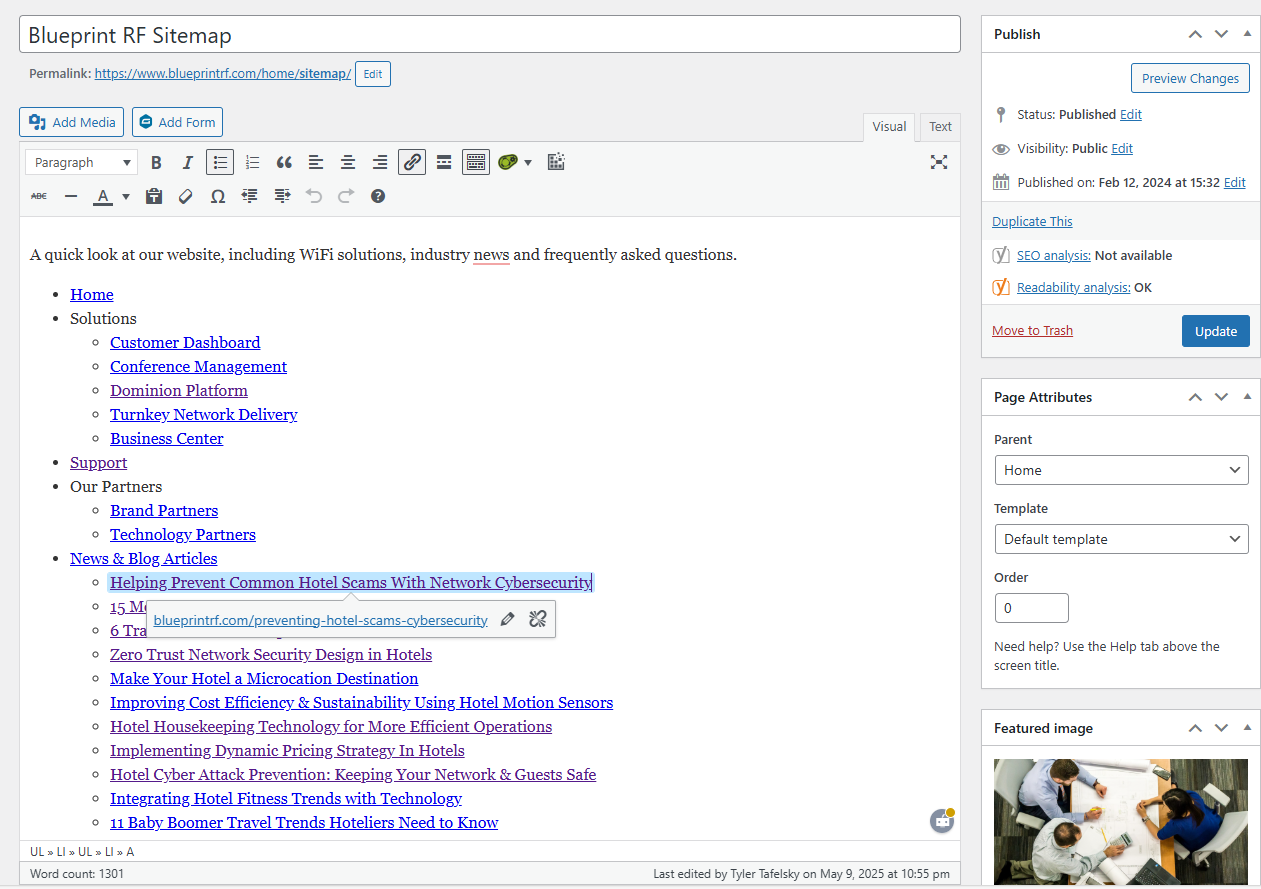
Save by hitting “Update”. Sometimes, adding things to the Sitemap page will mess up the formatting – it’s a good idea to “Preview” and make sure the front end of things is looking good.
Request Indexing
Go to Google Search Console’s URL Inspection tool (you’ll have to use the captivateseoanalytics@gmail.com account).
Select the correct site from the dropdown menu at the top left.
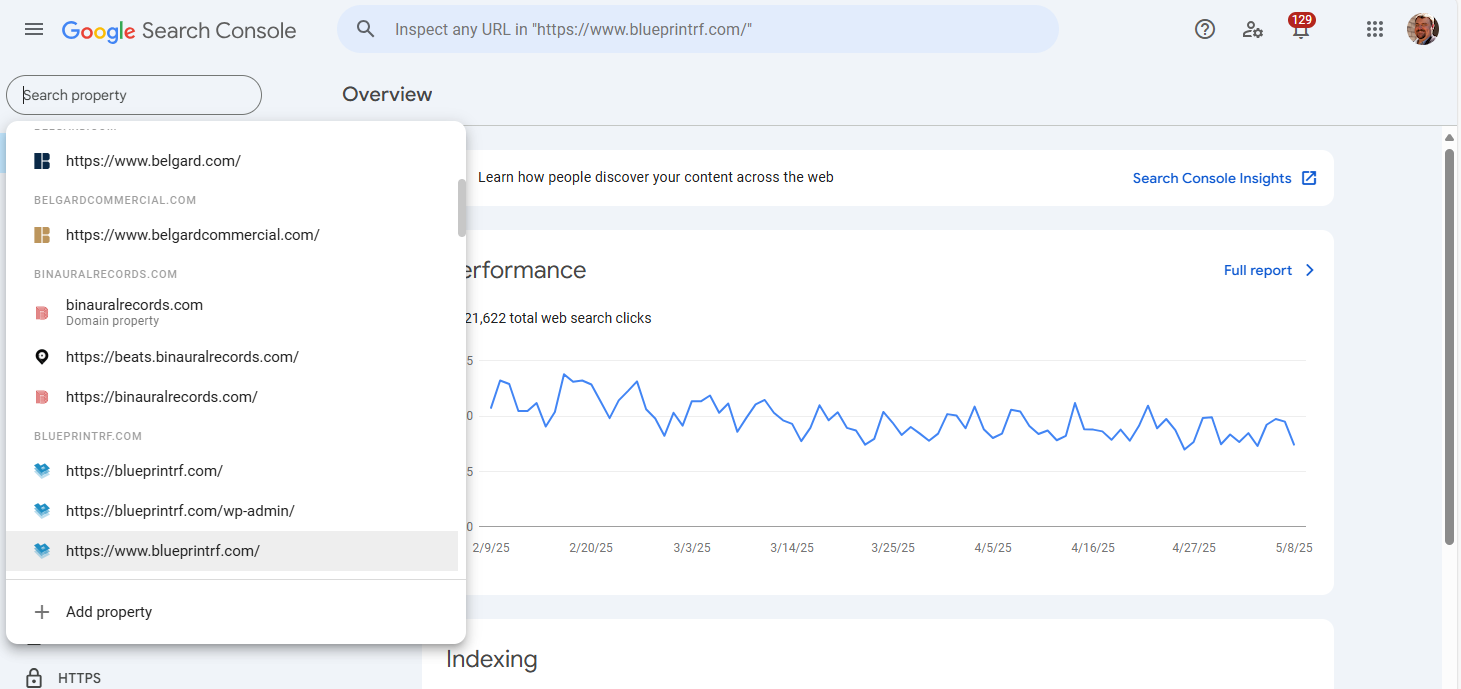
Paste in the newly published blog URL to the search bar at the top of the page and inspect.

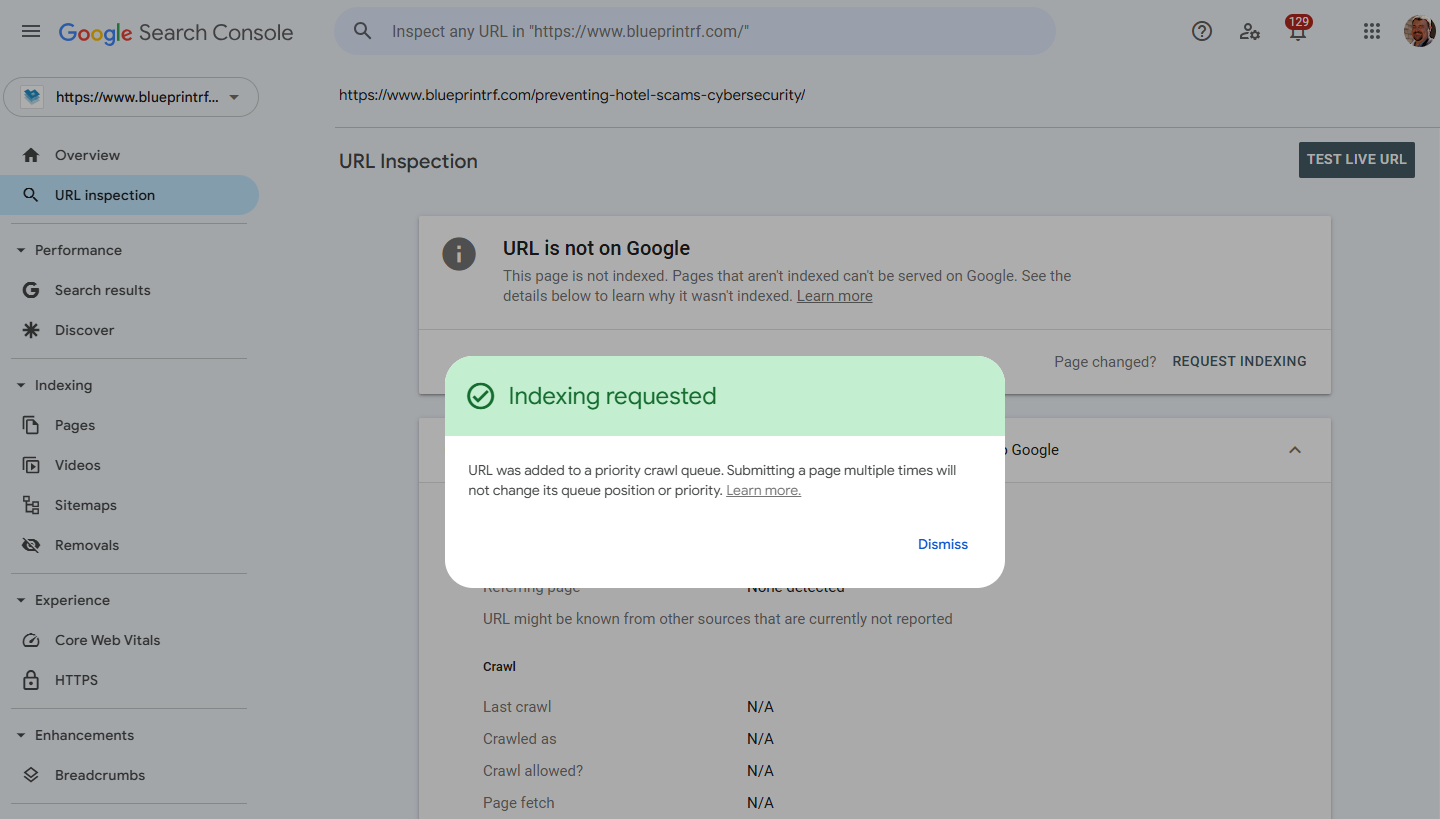
Then, press “Request Indexing”
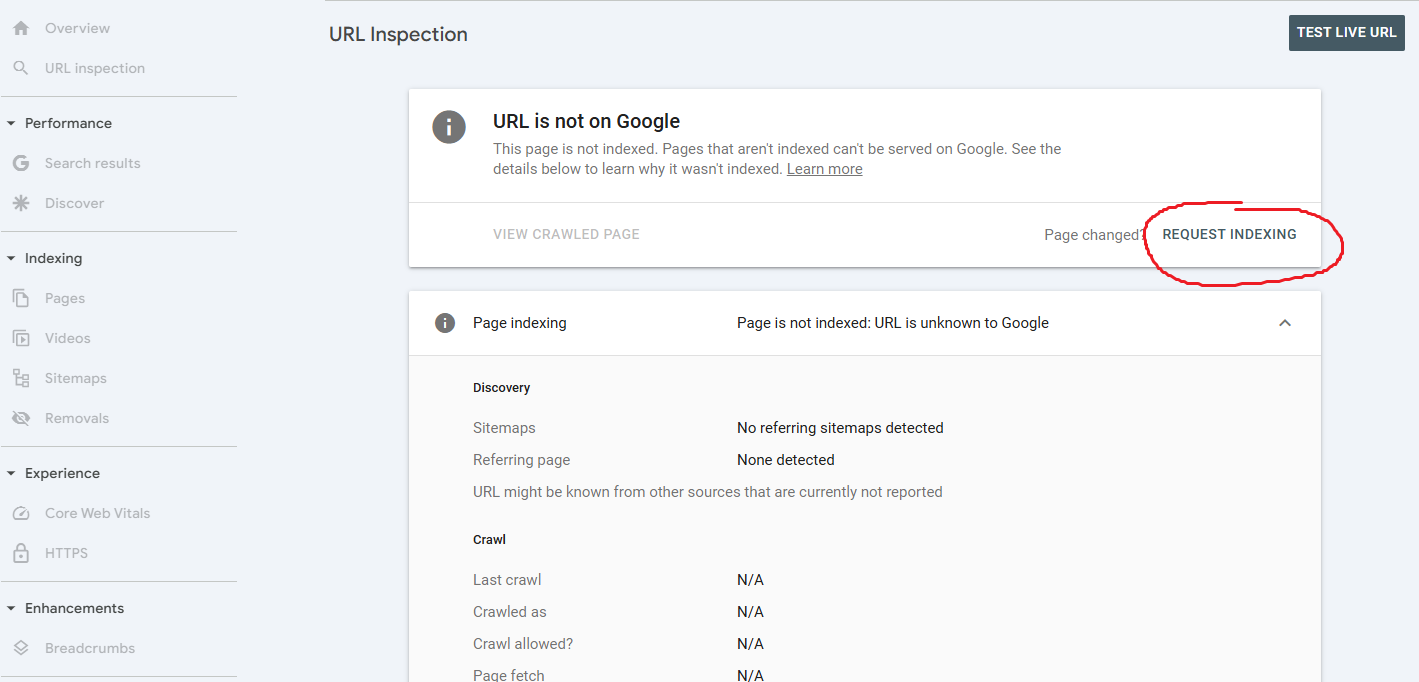
The URL will be added to a queue and will be indexed by Google!
Ta-da! You have successfully finalized & published blog content for HN or BPRF. Give yourself a pat on the back.