Blog Writing
Original Publish Date: 06/18/2025 by Anthony Madalone
Last Edited on: 06/18/2025 by Anthony Madalone
1. Secure Your Structure
First and foremost, make sure you have your blog structure in place before you start writing; keywords and headers will ultimately dictate all of the content you’re writing! If you have a blog structure already, congratulations, it’s time to write! If not, consult this handy guide on how to cross that threshold.
2. Figure Out Your Voice
While blog briefs and blog structure should tell you what you need to write in a blog, how you write such information will vary greatly from client to client. Things to consider before you start writing include:
- Formality: How formal is the brand in general?
- Target Audience: Who within the brand’s target audiences is this blog speaking to?
- Place in User Journey: Where in a target audience’s awareness with the brand are we communicating with them?
Previous blogs can also serve as a baseline for brand voice, although the answers to these questions may change from blog to blog within any individual brand.
Let’s go back to the example we used within the blog structuring process document, being “What is Hotel WiFi Bandwidth? How Much Your Hotel Needs.” Answering these questions, we get:
- Formality: Hospitality Network delivers hard data about WiFi technology to establish themselves as an authority within the field.
- Target Audience: Hospitality decision makers unsure about how much bandwidth they need within their hotel WiFi infrastructure.
- Place in User Journey: Early in awareness — seeking information on how much bandwidth they need, before they even know if and when they should upgrade.
With these considerations in mind, you’ll have a solid idea about the voice any given blog needs.
3. Write the Dang Blog
Yeah, what the header says. You’ve got an outline, you’ve got headers, you’ve got a voice — fill in the blanks, and make sure you cover everything highlighted in the brief!
One note for blog writing: try to use bulleted lists as much as possible. AI and Google both LOVE when content is broken down into digestible lists, and it helps us with SEO! For example, take this potential section for “What is Hotel WiFi Bandwidth? How Much Your Hotel Needs”:

Well written and informative! But also a little chunky. Looking at this paragraph, I see a natural list in the last section. Let’s break it up and add even more information:
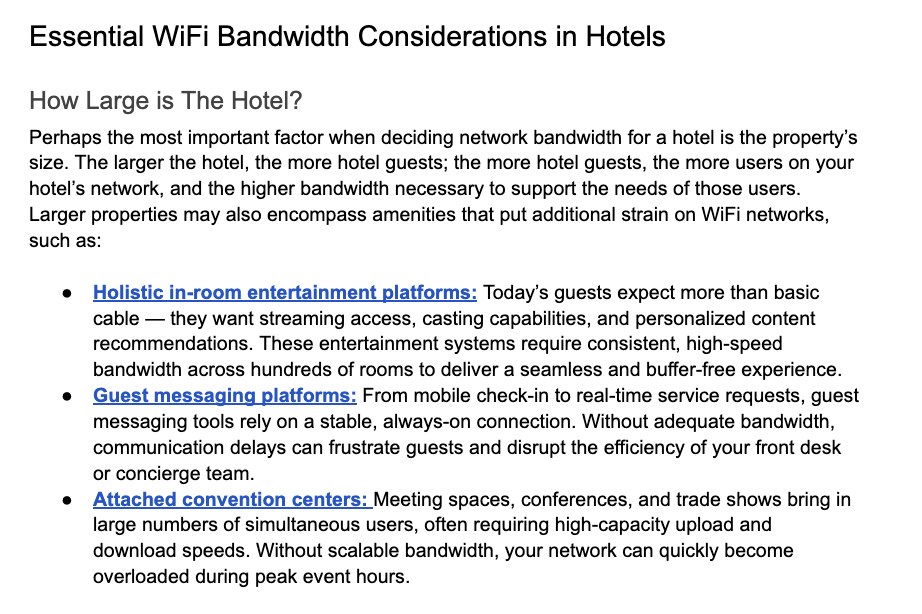
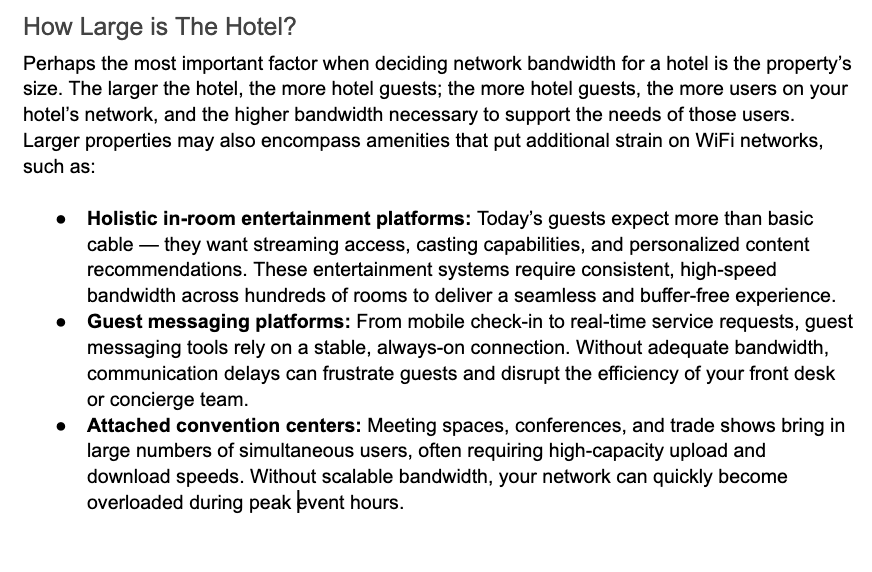 Now we’re cooking with bullets! Add sections like these as often as you can, and try to identify sections for potential expansion/bulleted lists as you revise your work. Ultimately, blog copy should be around 800-1200 words.
4. Add Internal/Outbound Linking
So you’ve written a blog. Heck yeah! Now’s time to add some finishing touches — first and foremost being the addition of links. We typically shoot for at least two outbound links and two internal links in every blog post we write; finding opportunities to post these links is often quite intuitive!
Let’s start with internal links. Most successful blog posts inherently talk about other offerings that a brand has within copy; find these opportunities and link on! Look at the bulleted list example above for “What is Hotel WiFi Bandwidth? How Much Your Hotel Needs.” Each of those bullets reference information found elsewhere on Hospitality Network’s website; sounds like a time to link!
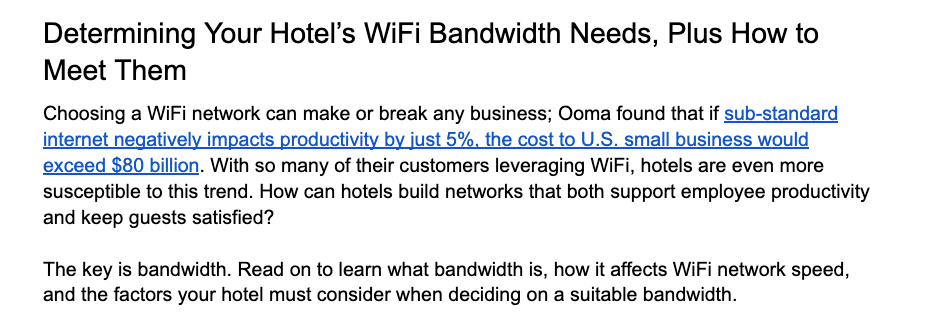
Outbound linking usually requires a slightly higher level of effort; look for areas where a notable statistic can support whatever argument a section of your blog is making. Introductions are typically a great place to do this. Let’s look at a potential intro for “What is Hotel WiFi Bandwidth? How Much Your Hotel Needs”:
Looking at this introduction, we mention that “choosing a WiFi network can make or break any business” — how can we support this claim? Googling “WiFi business statistics” led me to this link, which I added:
Finding opportunities for internal and outbound linking is a key part of the revision process, and helps drive SEO and domain authority up another level!
5. Add Imagery + Alts
With a beautiful piece of blog content now in front of you, it’s time for the final step before review — adding imagery. Each of our blogs gets at least three pieces of imagery, sourced through Adobe Stock. I’d simply recommend googling terms related to the blog and see what pops up!
Don’t source the images until the client approves them; instead, pull the watermarked sample version. Add these watermarked versions evenly dispersed throughout the blog post, with the first image coming between the blog title and its first H2.
Once you add images, make sure to write alts as well. These captions serve to help our images rank within Google Images, and should capture keywords targeted within the post. Ultimately, an image should look something like this once ready to send:

Now, your blog should be ready for review! Throw it in the “Chris Review This” channel and let it shine.